Home →
Cloud Services →
Printer Friendly Version
Cloud Services
1. Managed Antivirus (BitDefender)
1.1. How to uninstall the software (Mac)
Under normal operation, we can remotely remove the endpoint agent from the management console. This is a remote operation and doesn't require any manual intervention.
In some circumstances, the agent software may not uninstall correctly and will need to be manually removed. The following instructions must be performed locally using Terminal.
In order to remove the product from the machine you can either use these commands:
- sudo /Library/Application\ Support/Antivirus\ for\ Mac/Tools/uninstaller.py
- /Library/Bitdefender/AVP/Uninstaller/BitdefenderforMacUninstaller.app/Contents/Resources/preinstall.py
Please follow this guide to completely remove the software:
https://www.bitdefender.com/support/how-to-uninstall-antivirus-for-mac-if-the-standard-uninstaller-doesn&039;t-work-1722.html
Finally,if the situation is not resolved, please do provide us with a Bdprofiller from the affected machine so that we could investigate further.
www.bitdefender.com/support/generating-endpoint-security-support-tool-log-for-mac-os-1556.html
1.2. After upgrading to macOS 13 Ventura, Endpoint Security for Mac informs you Full Disk Access is not granted
After upgrading to macOS 13 Ventura, Endpoint Security for Mac informs you Full Disk Access is not granted
This topic helps you troubleshoot an issue with existing installations of Endpoint Security for Mac that occurs after upgrading to macOS 13 Ventura.
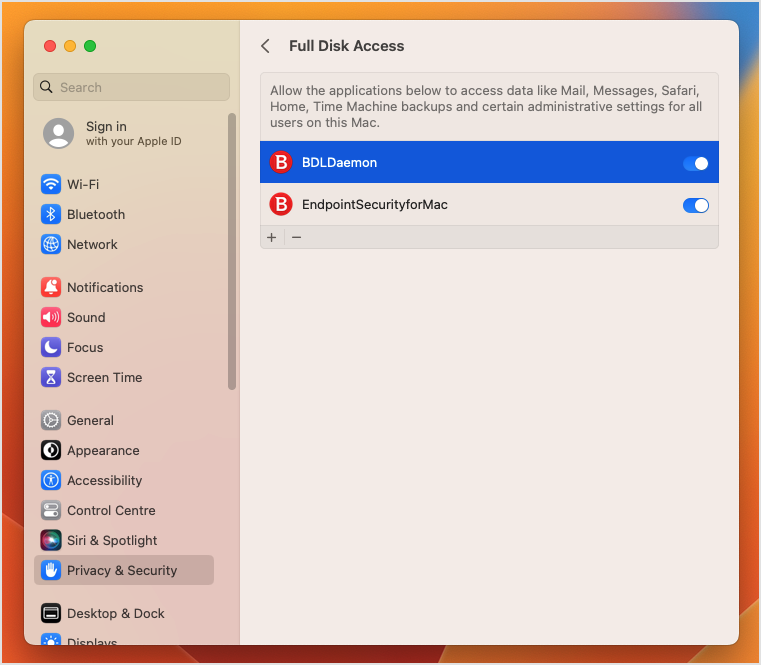
After upgrading to macOS 13 Ventura, Endpoint Security for Mac informs you that Full Disk Access is not granted for the BDLDaemon.app file.
However, when checking the Full Disk Access permissions, you notice that BDLDaemon is already enabled.
This is a known issue also described by Apple in the release notes for macOS 13 Ventura.
This situation happens due to a macOS issue that affects the existing installations of Endpoint Security for Mac.
To fix it, you need to remove the BDLDaemon entry from the Full Disk Access list and add it back. Follow these steps:
-
On Mac, go to System Settings > Security & Privacy.
-
Select Full Disk Access and click - (minus) to delete BDLDaemon from list. If you just disable it, the issue still occurs.
-
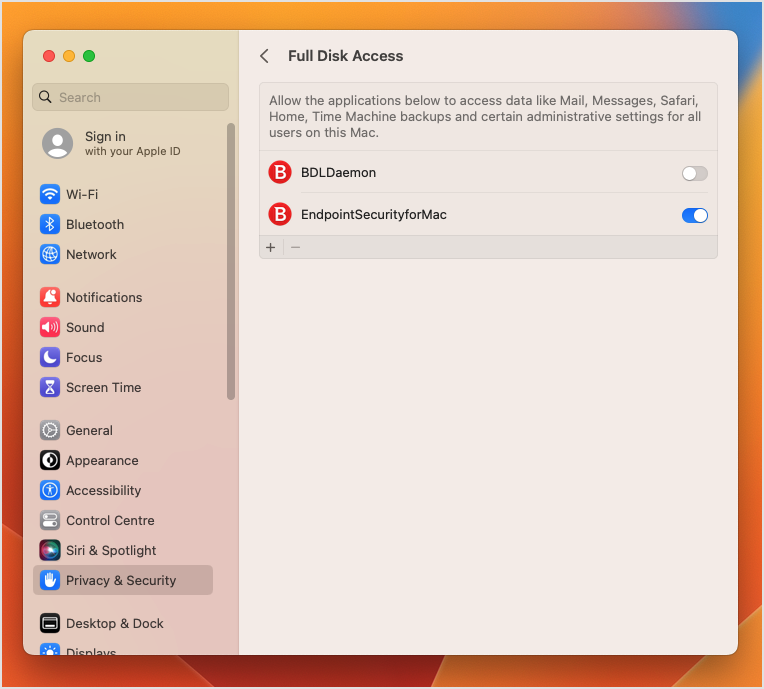
After deleting, BDLDaemon automatically reappears because the operating system detects it, but it is disabled.
-
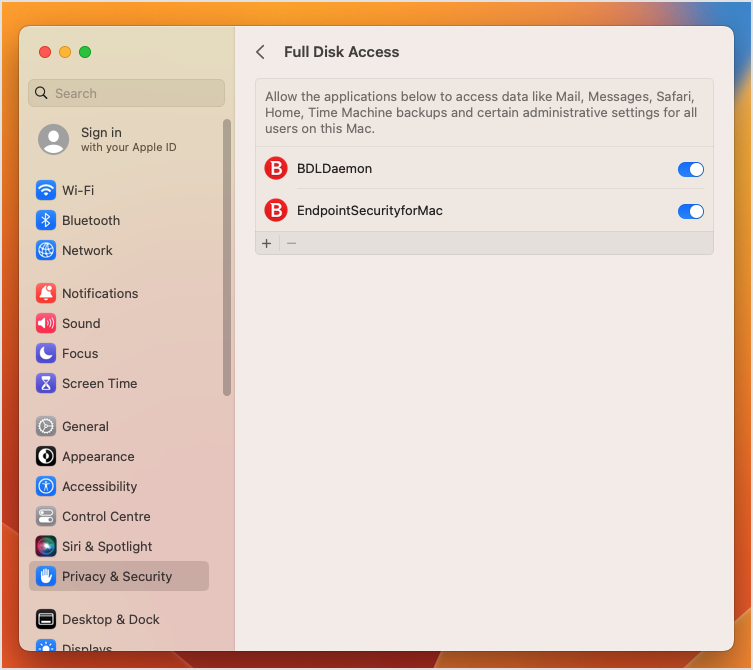
Click to enable BDLDaemon and wait for 60-70 seconds.
-
BDLDaemon now has Full Disk Access permissions and the issue disappears from the Endpoint Security for Mac interface.
2. Patch Management
3. NomaDesk
3.1. Removing a user / license
go to Manage

Billing -> License Overview -> select the user that you want to remove and click Manage next to that user
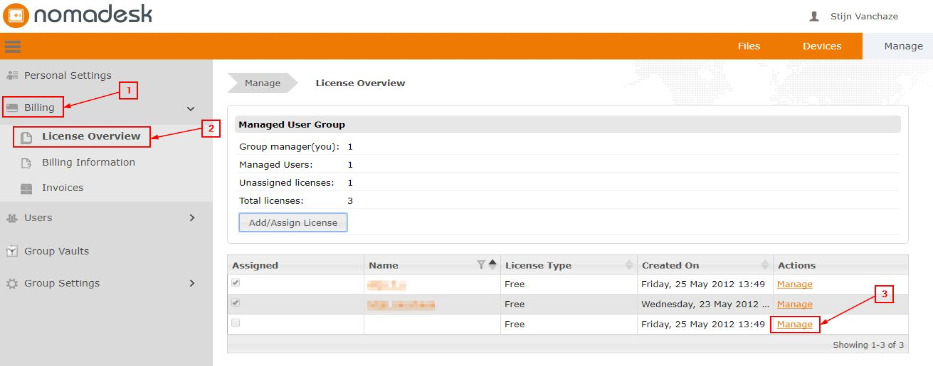
click Remove User
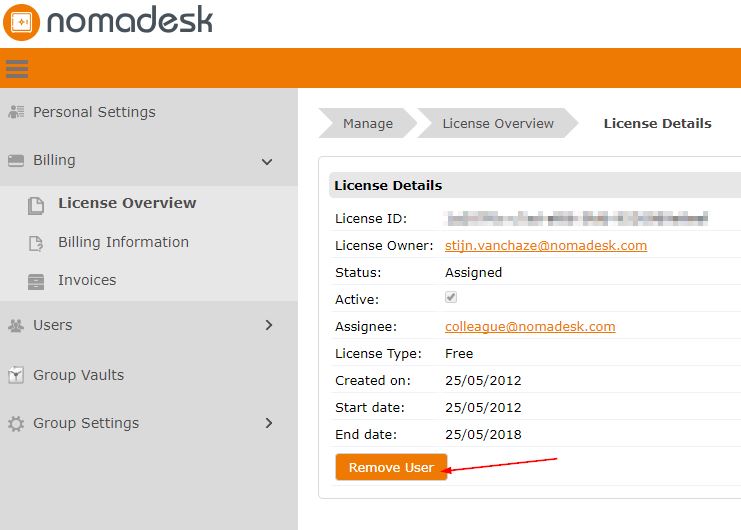
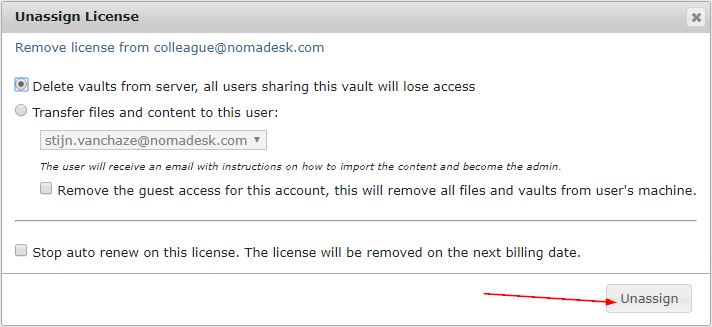
- you will see several options:
-Delete vaults from server all users sharing this vault will loose access.
This will only remove any possible Vaults that the user that you want to remove has created, this will NOT remove the Vault that the user is a guest on.
-Transfer files and content to this user.
If the user that you want to remove created its own Vault, you can transfer the Vault to another person or yourself via this option.
-Remove guest access for this account.
This option will also delete the local copies of the Vaults from any PC the user is logged in at.
-Stop auto renew on this license.
This will remove the license on the next billing date. If you don't select the option, the license will go to your unassigned licenses and will be automatically renewed on the next billing date.
Do keep in mind that you are also charged for unassigned licenses. So if you want to remove the user and the license, be sure to check this option.
3.2. Assigning an unassigned license

go to billing -> license overview -> click on manage next to an unassigned license
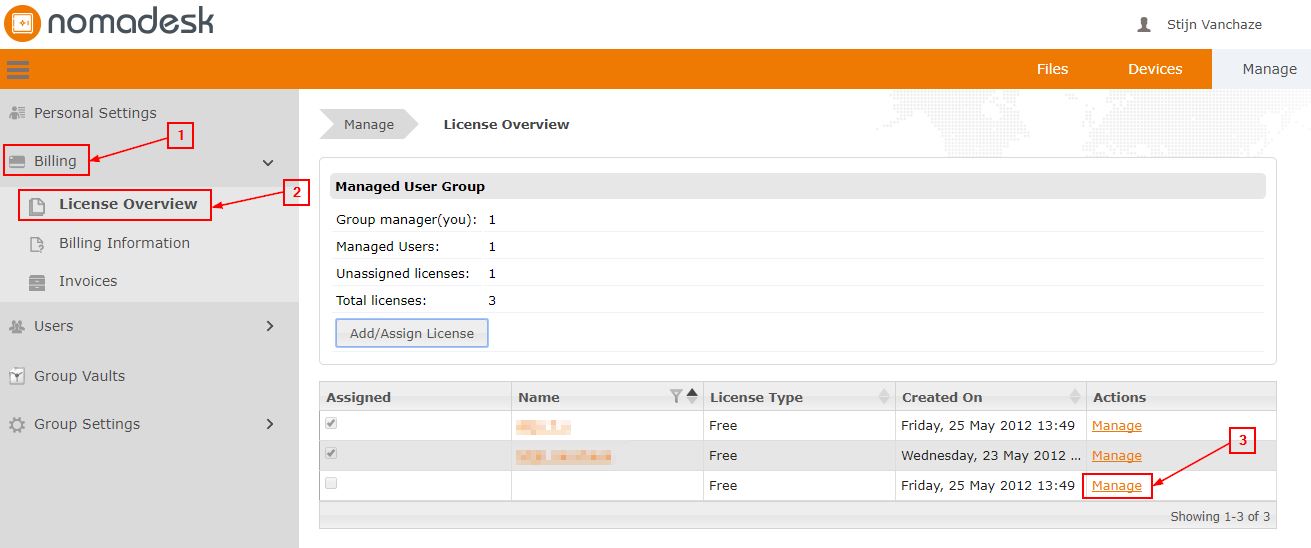
fill out the email address of the user that you want to assign the license to and click save
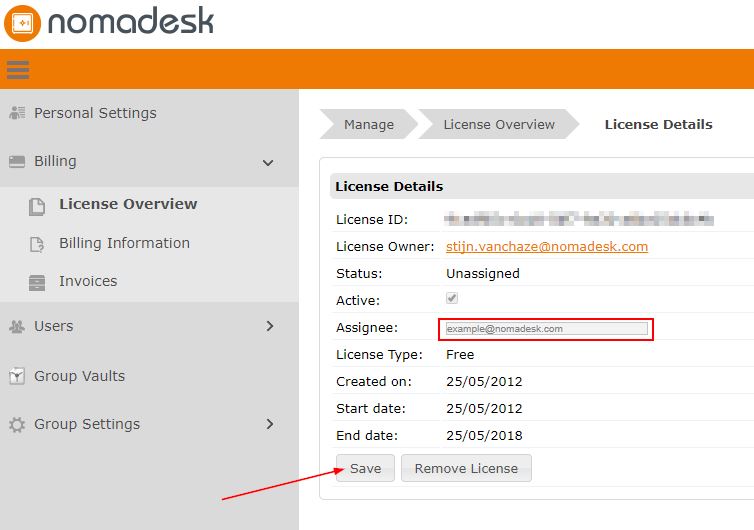
An email will be sent to the new user. If they have never worked with NomaDesk before, they will be required to enter their name and a new password.
Don't forget that the new user will need to be assigned access to your company vault before they can access it!
To do this click on files at the top right of the window, and users and permissions from the left menu. Click on invite guest and enter the same email address as the newly licensed user. They will receive a notification that you have added them to the vault.


